Host challenge
EvalAI supports hosting challenges with different configurations. Challenge organizers can choose to customize most aspects of the challenge but not limited to:
- Evaluation metrics
- Language/Framework to implement the metric
- Number of phases and data-splits
- Daily / monthly / overall submission limit
- Number of workers evaluating submissions
- Evaluation on remote machines
- Provide your AWS credentials to host code upload based challenge
- Show / hide error bars on leaderboard
- Public / private leaderboards
- Allow / block certain email addresses to participate in the challenge or phase
- Choose which fields to export while downloading challenge submissions
We have hosted challenges from different domains such as:
- Machine learning (2019 SIOP Machine Learning Competition)
- Deep learning (Visual Dialog Challenge 2019 )
- Computer vision (Vision and Language Navigation)
- Natural language processing (VQA Challenge 2019)
- Healthcare (fastMRI Image Reconstruction )
- Self-driving cars (CARLA Autonomous Driving Challenge)
We categorize the challenges in two categories:
Prediction upload based challenges: Participants upload predictions corresponding to ground truth labels in the form of a file (could be any format:
json,npy,csv,txtetc.)Some of the popular prediction upload based challenges that we have hosted are shown below:

If you are interested in hosting prediction upload based challenges, then click here.
Code upload based challenges: In these kind of challenges, participants upload their training code in the form of docker images using EvalAI-CLI.
Some of the popular code upload based challenges that we have hosted are shown below:

If you are interested in hosting code upload based challenges, then click here.
Host challenge using github
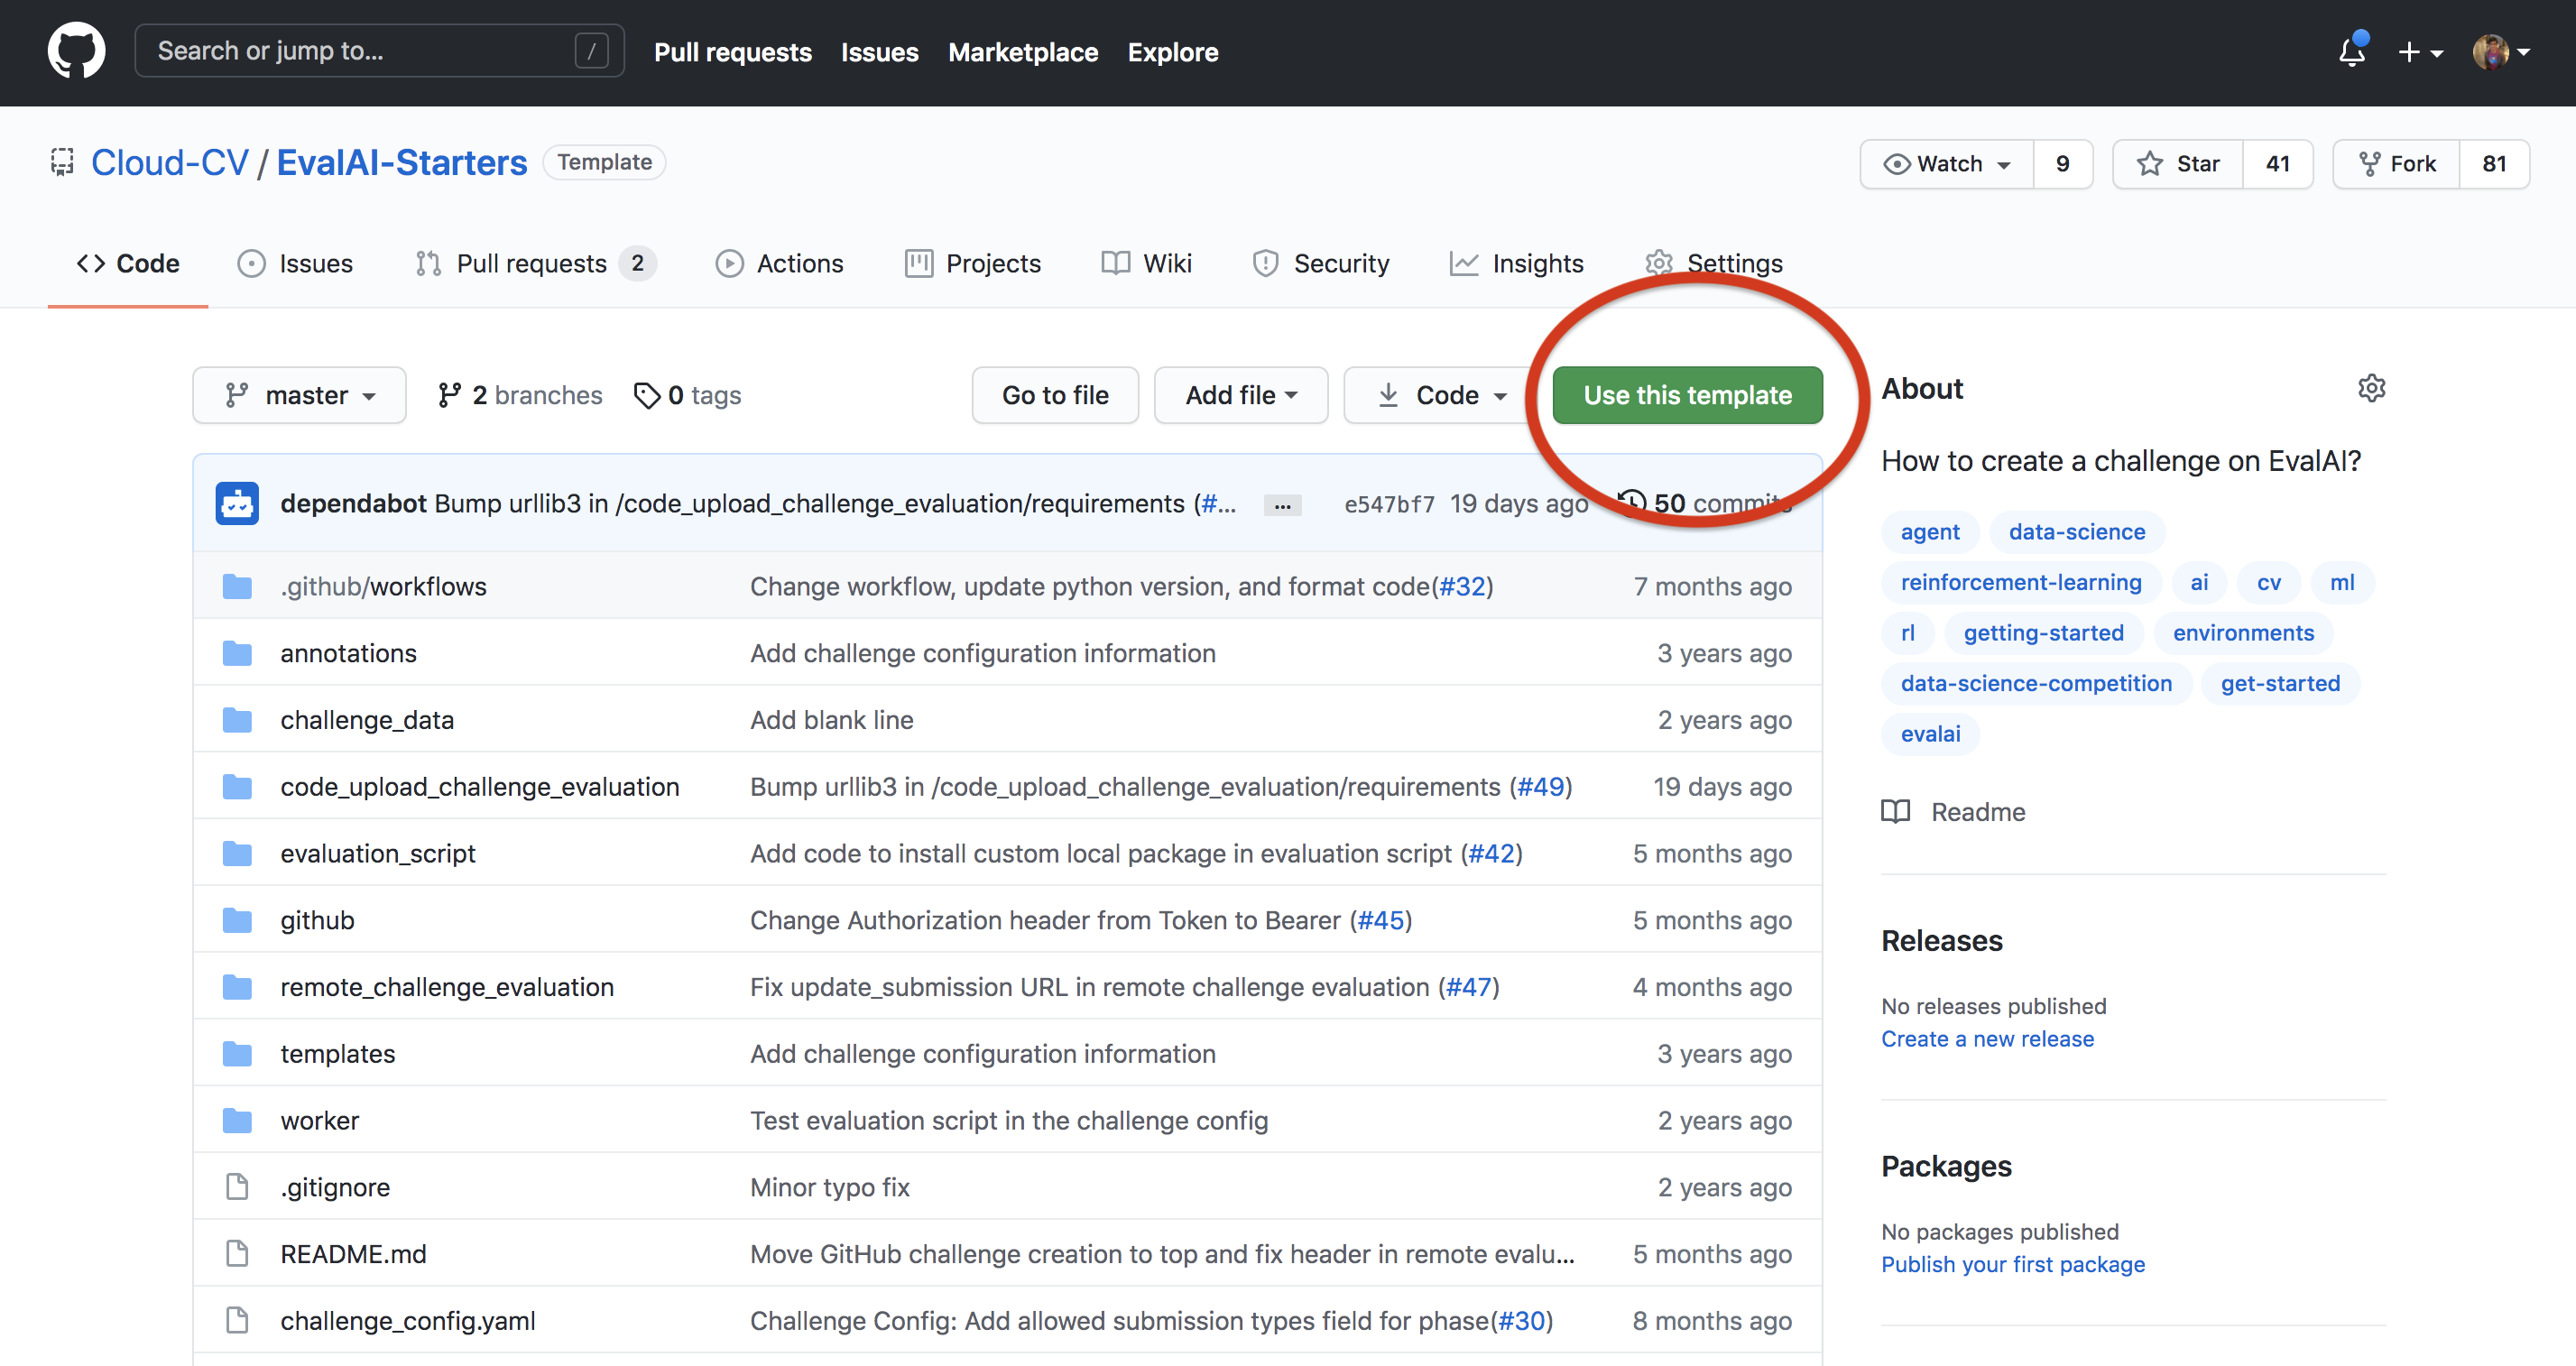
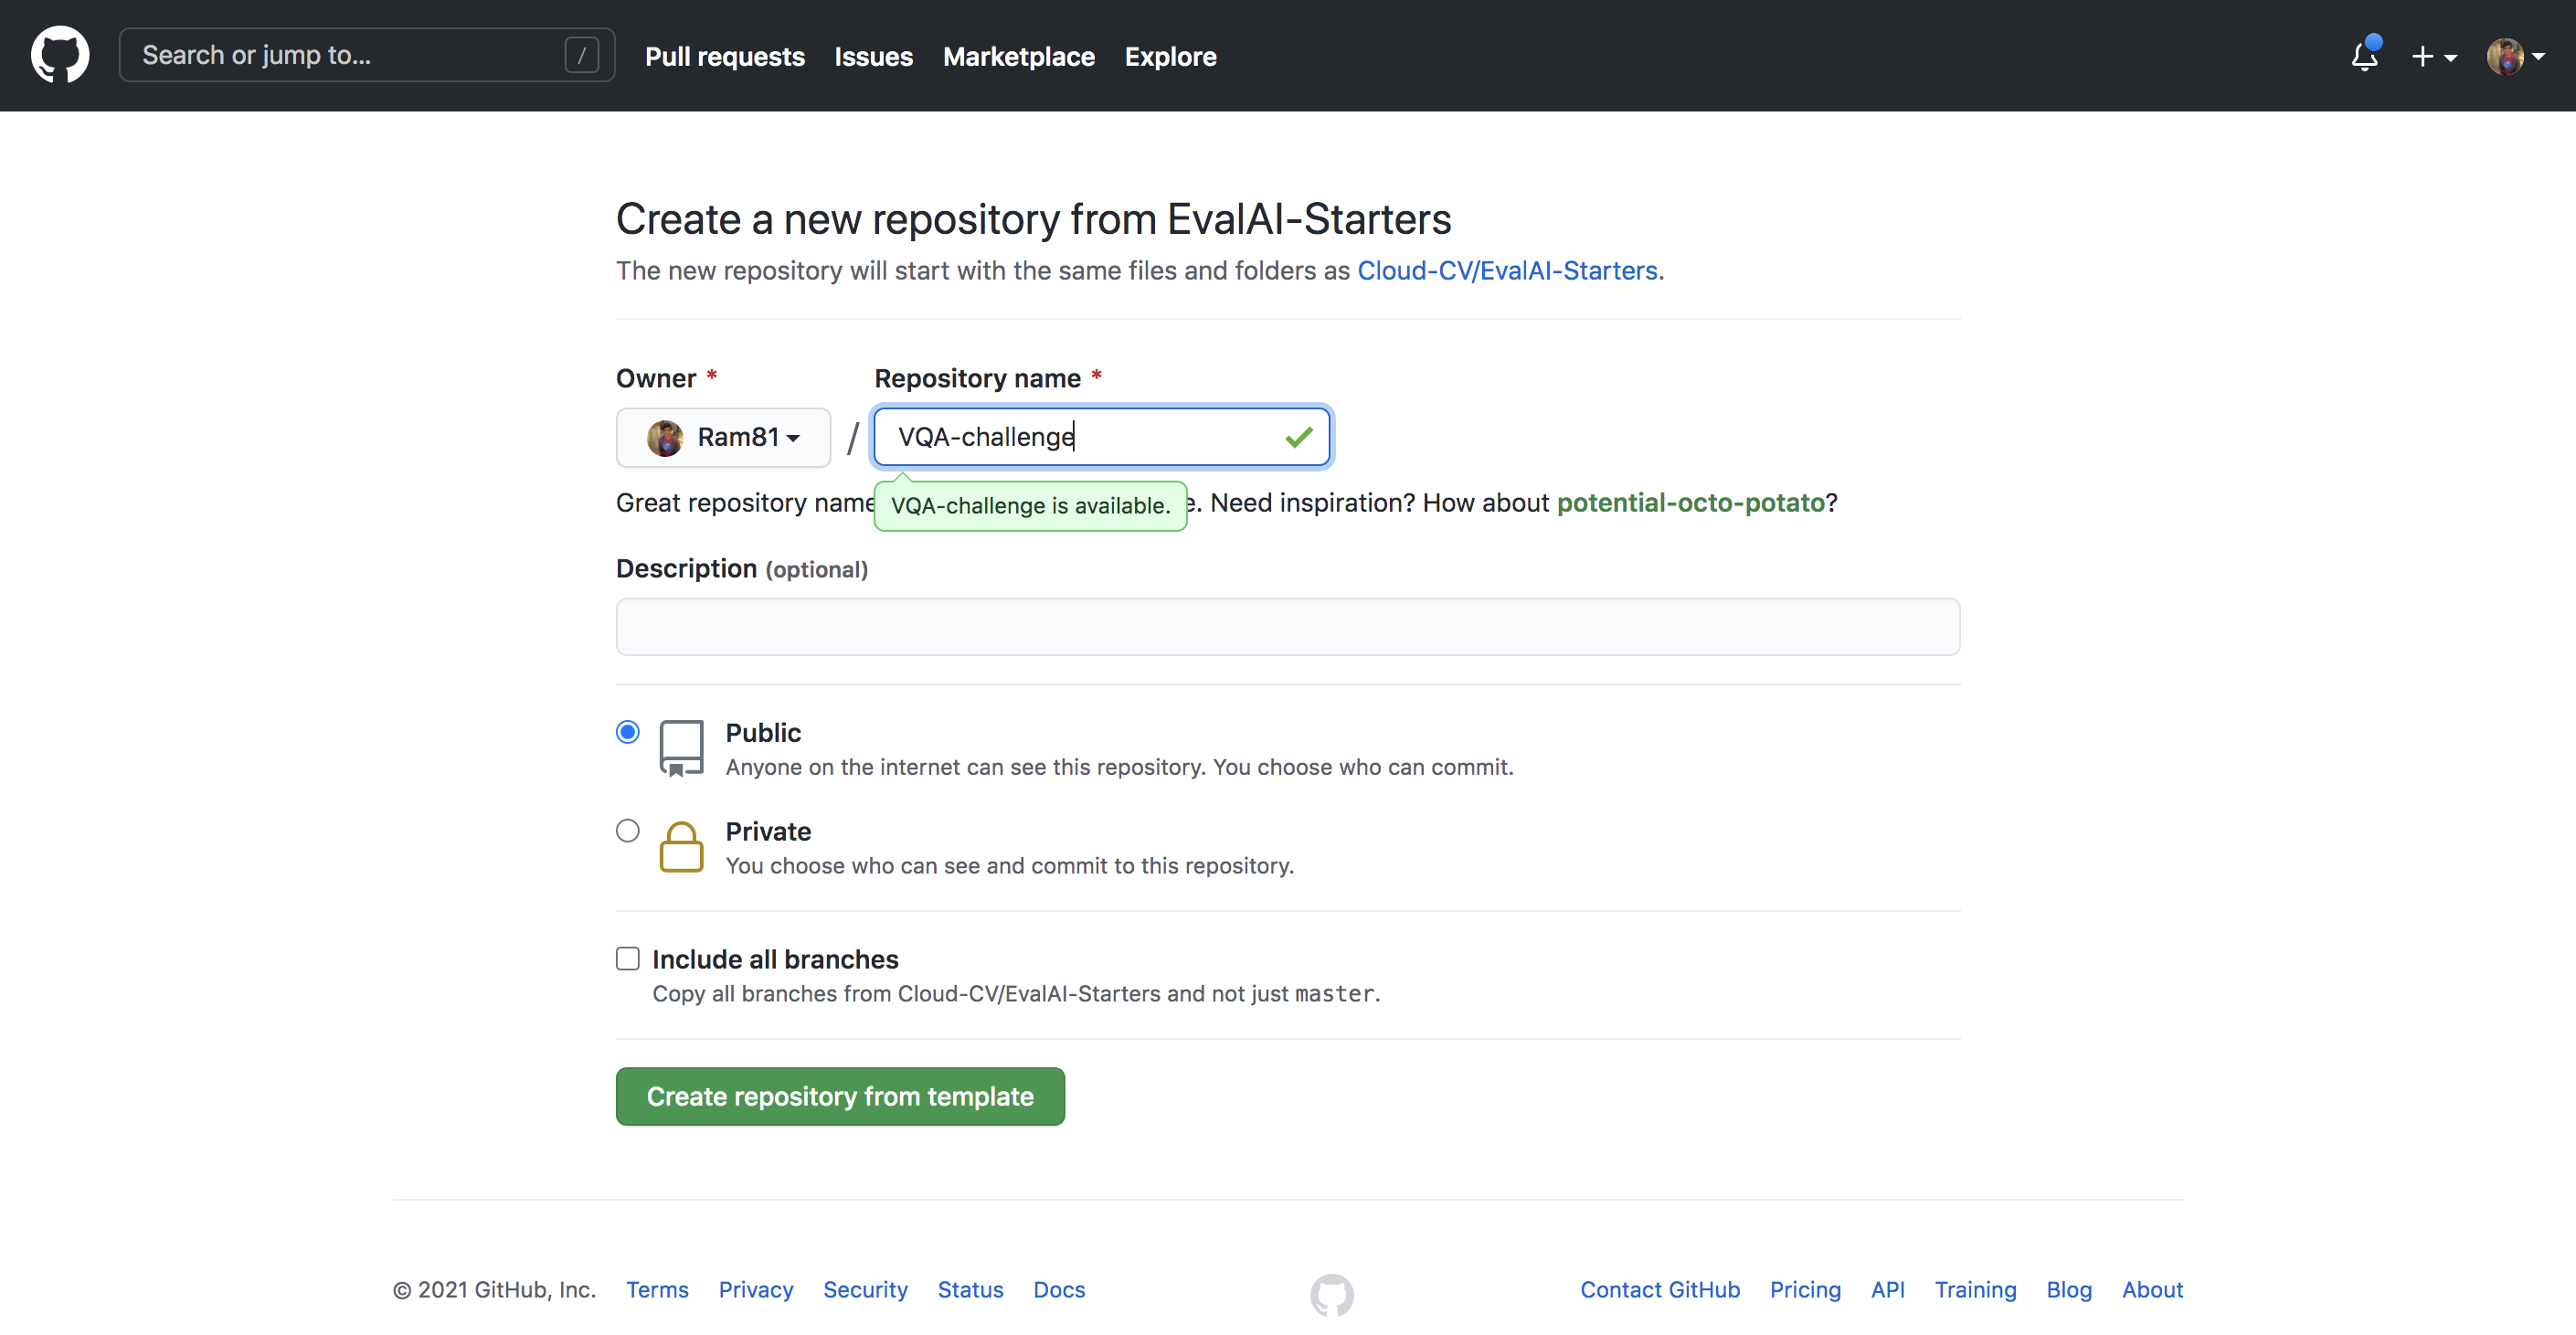
Step 1: Use template
Use EvalAI-Starters template. See this on how to use a repository as template.
Step 2: Generate github token
Generate your github personal acccess token and copy it in clipboard.
Add the github personal access token in the forked repository’s secrets with the name AUTH_TOKEN.
Step 3: Setup host configuration
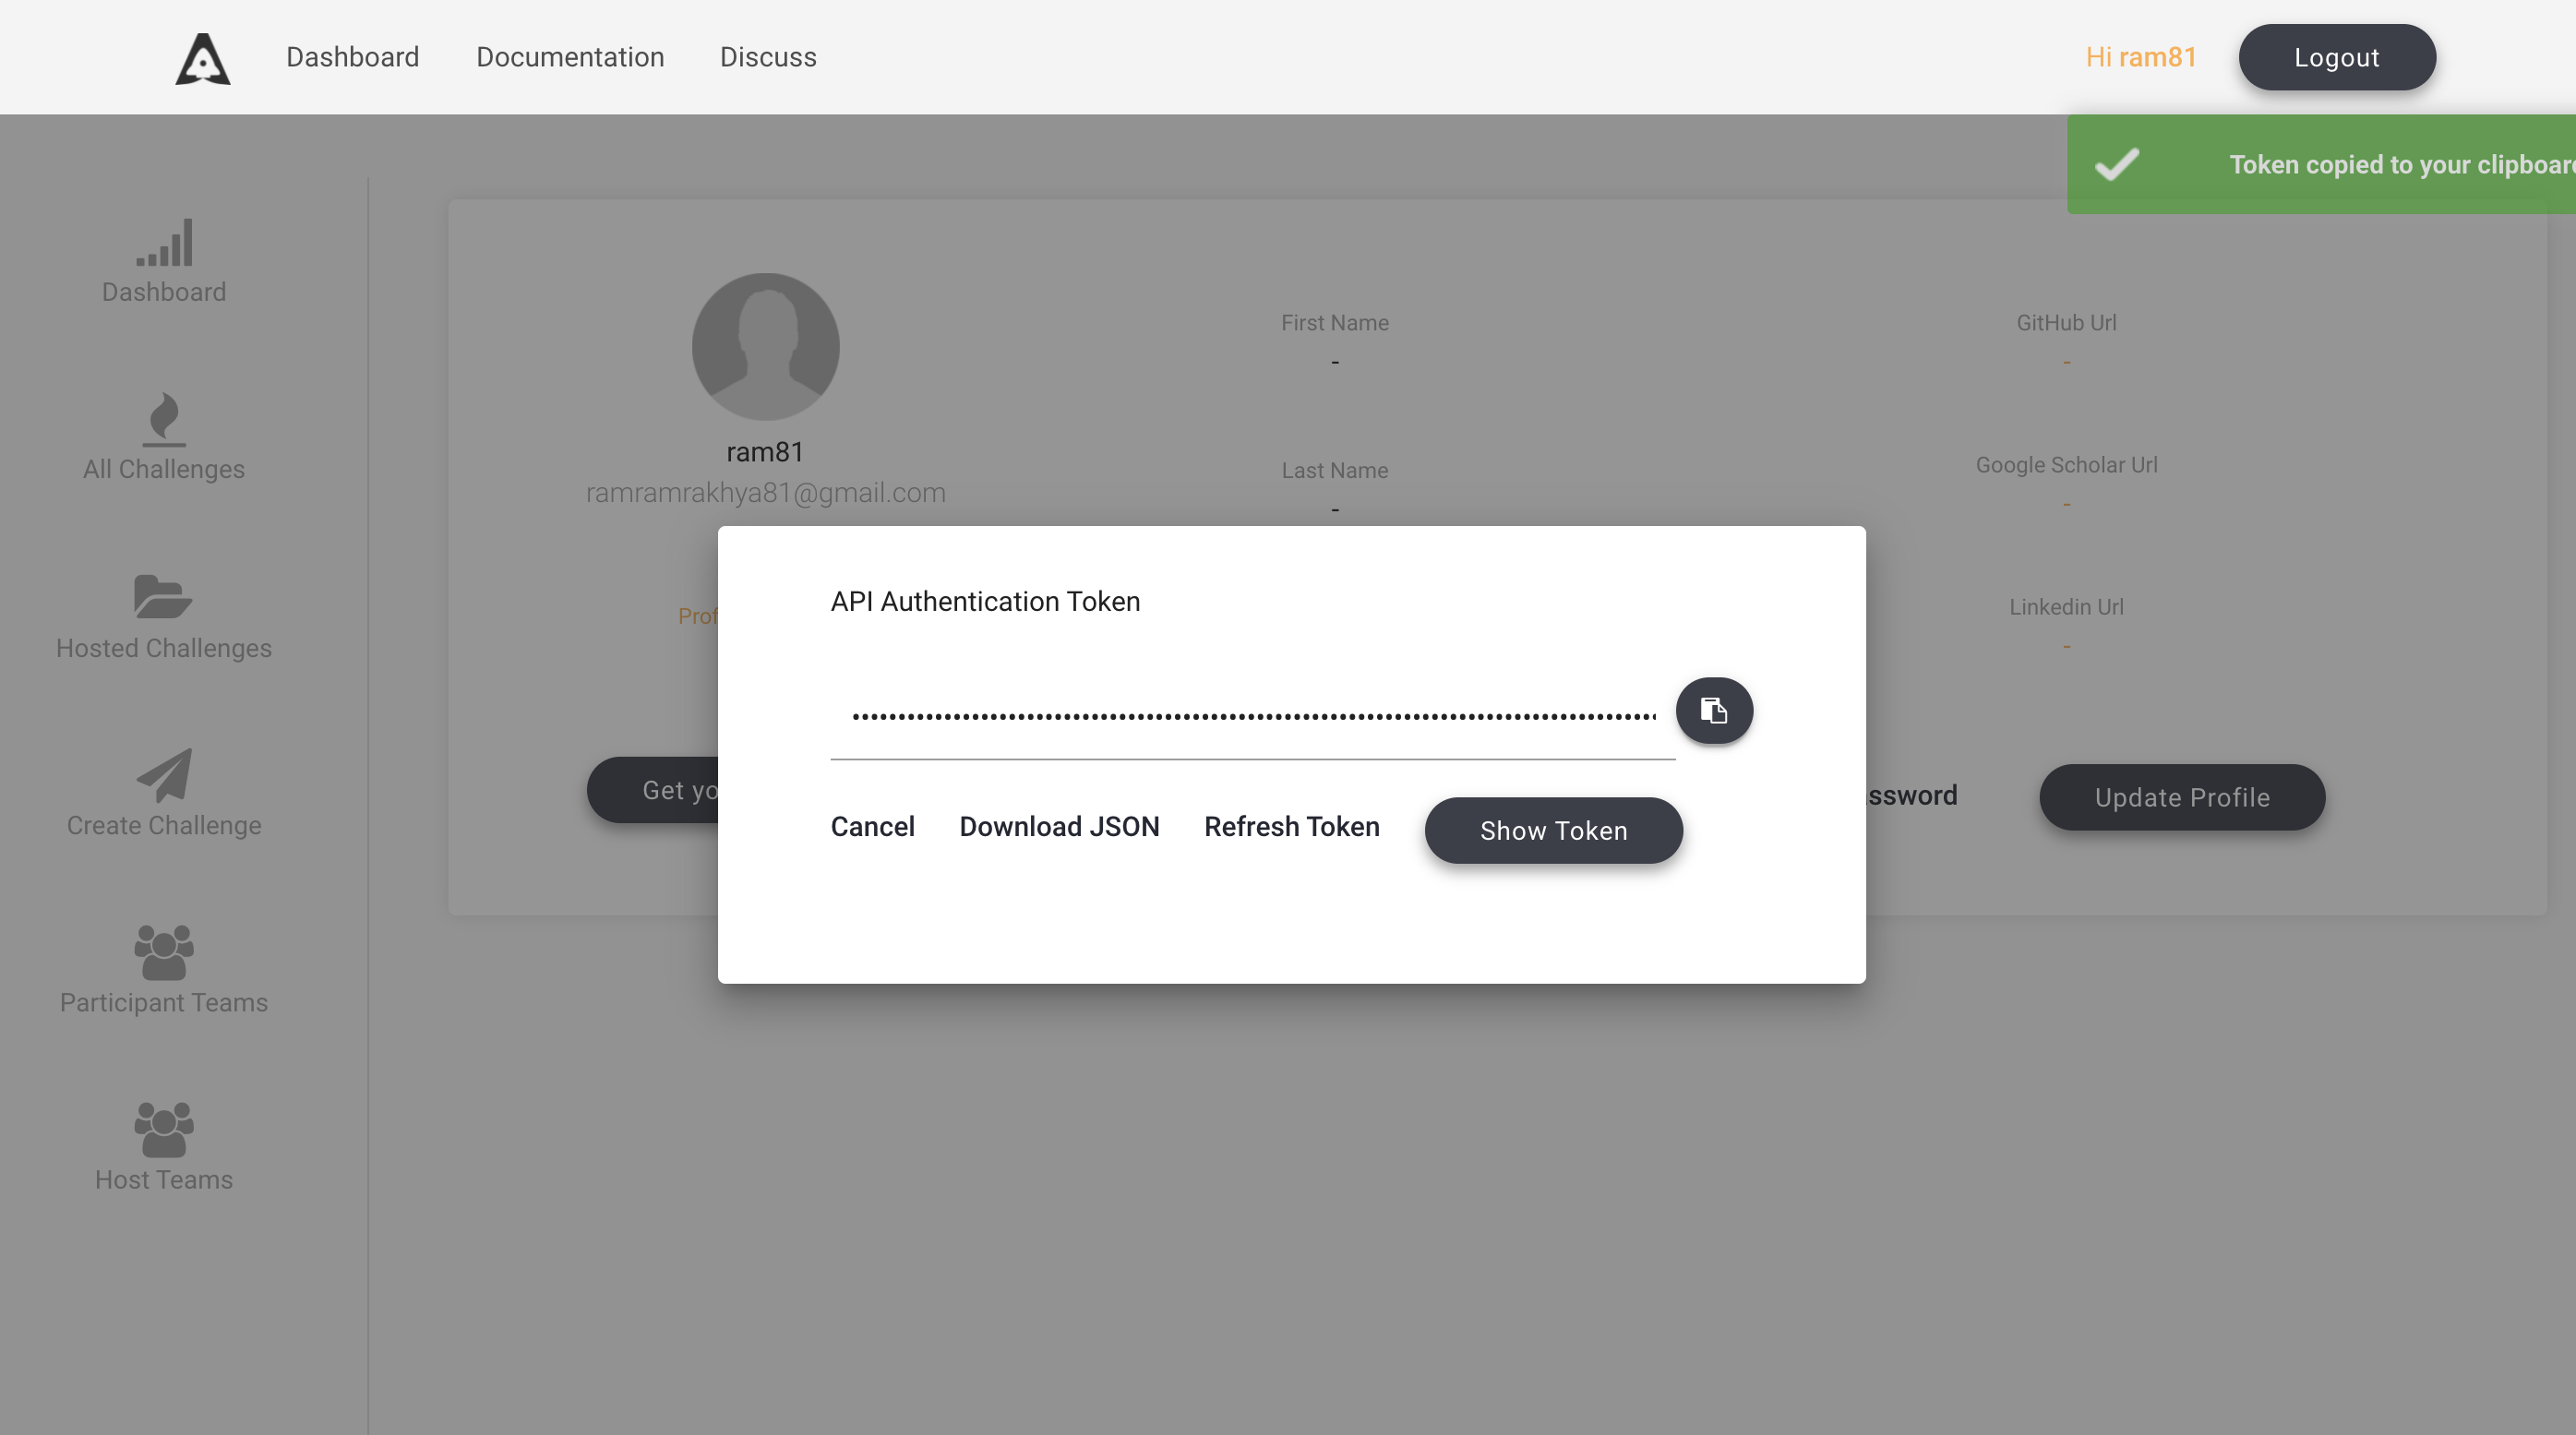
Now, go to EvalAI to fetch the following details -
evalai_user_auth_token- Go to profile page after logging in and click onGet your Auth Tokento copy your auth token.host_team_pk- Go to host team page and copy theIDfor the team you want to use for challenge creation.evalai_host_url- Usehttps://eval.aifor production server andhttps://staging.eval.aifor staging server.
Step 4: Setup automated update push
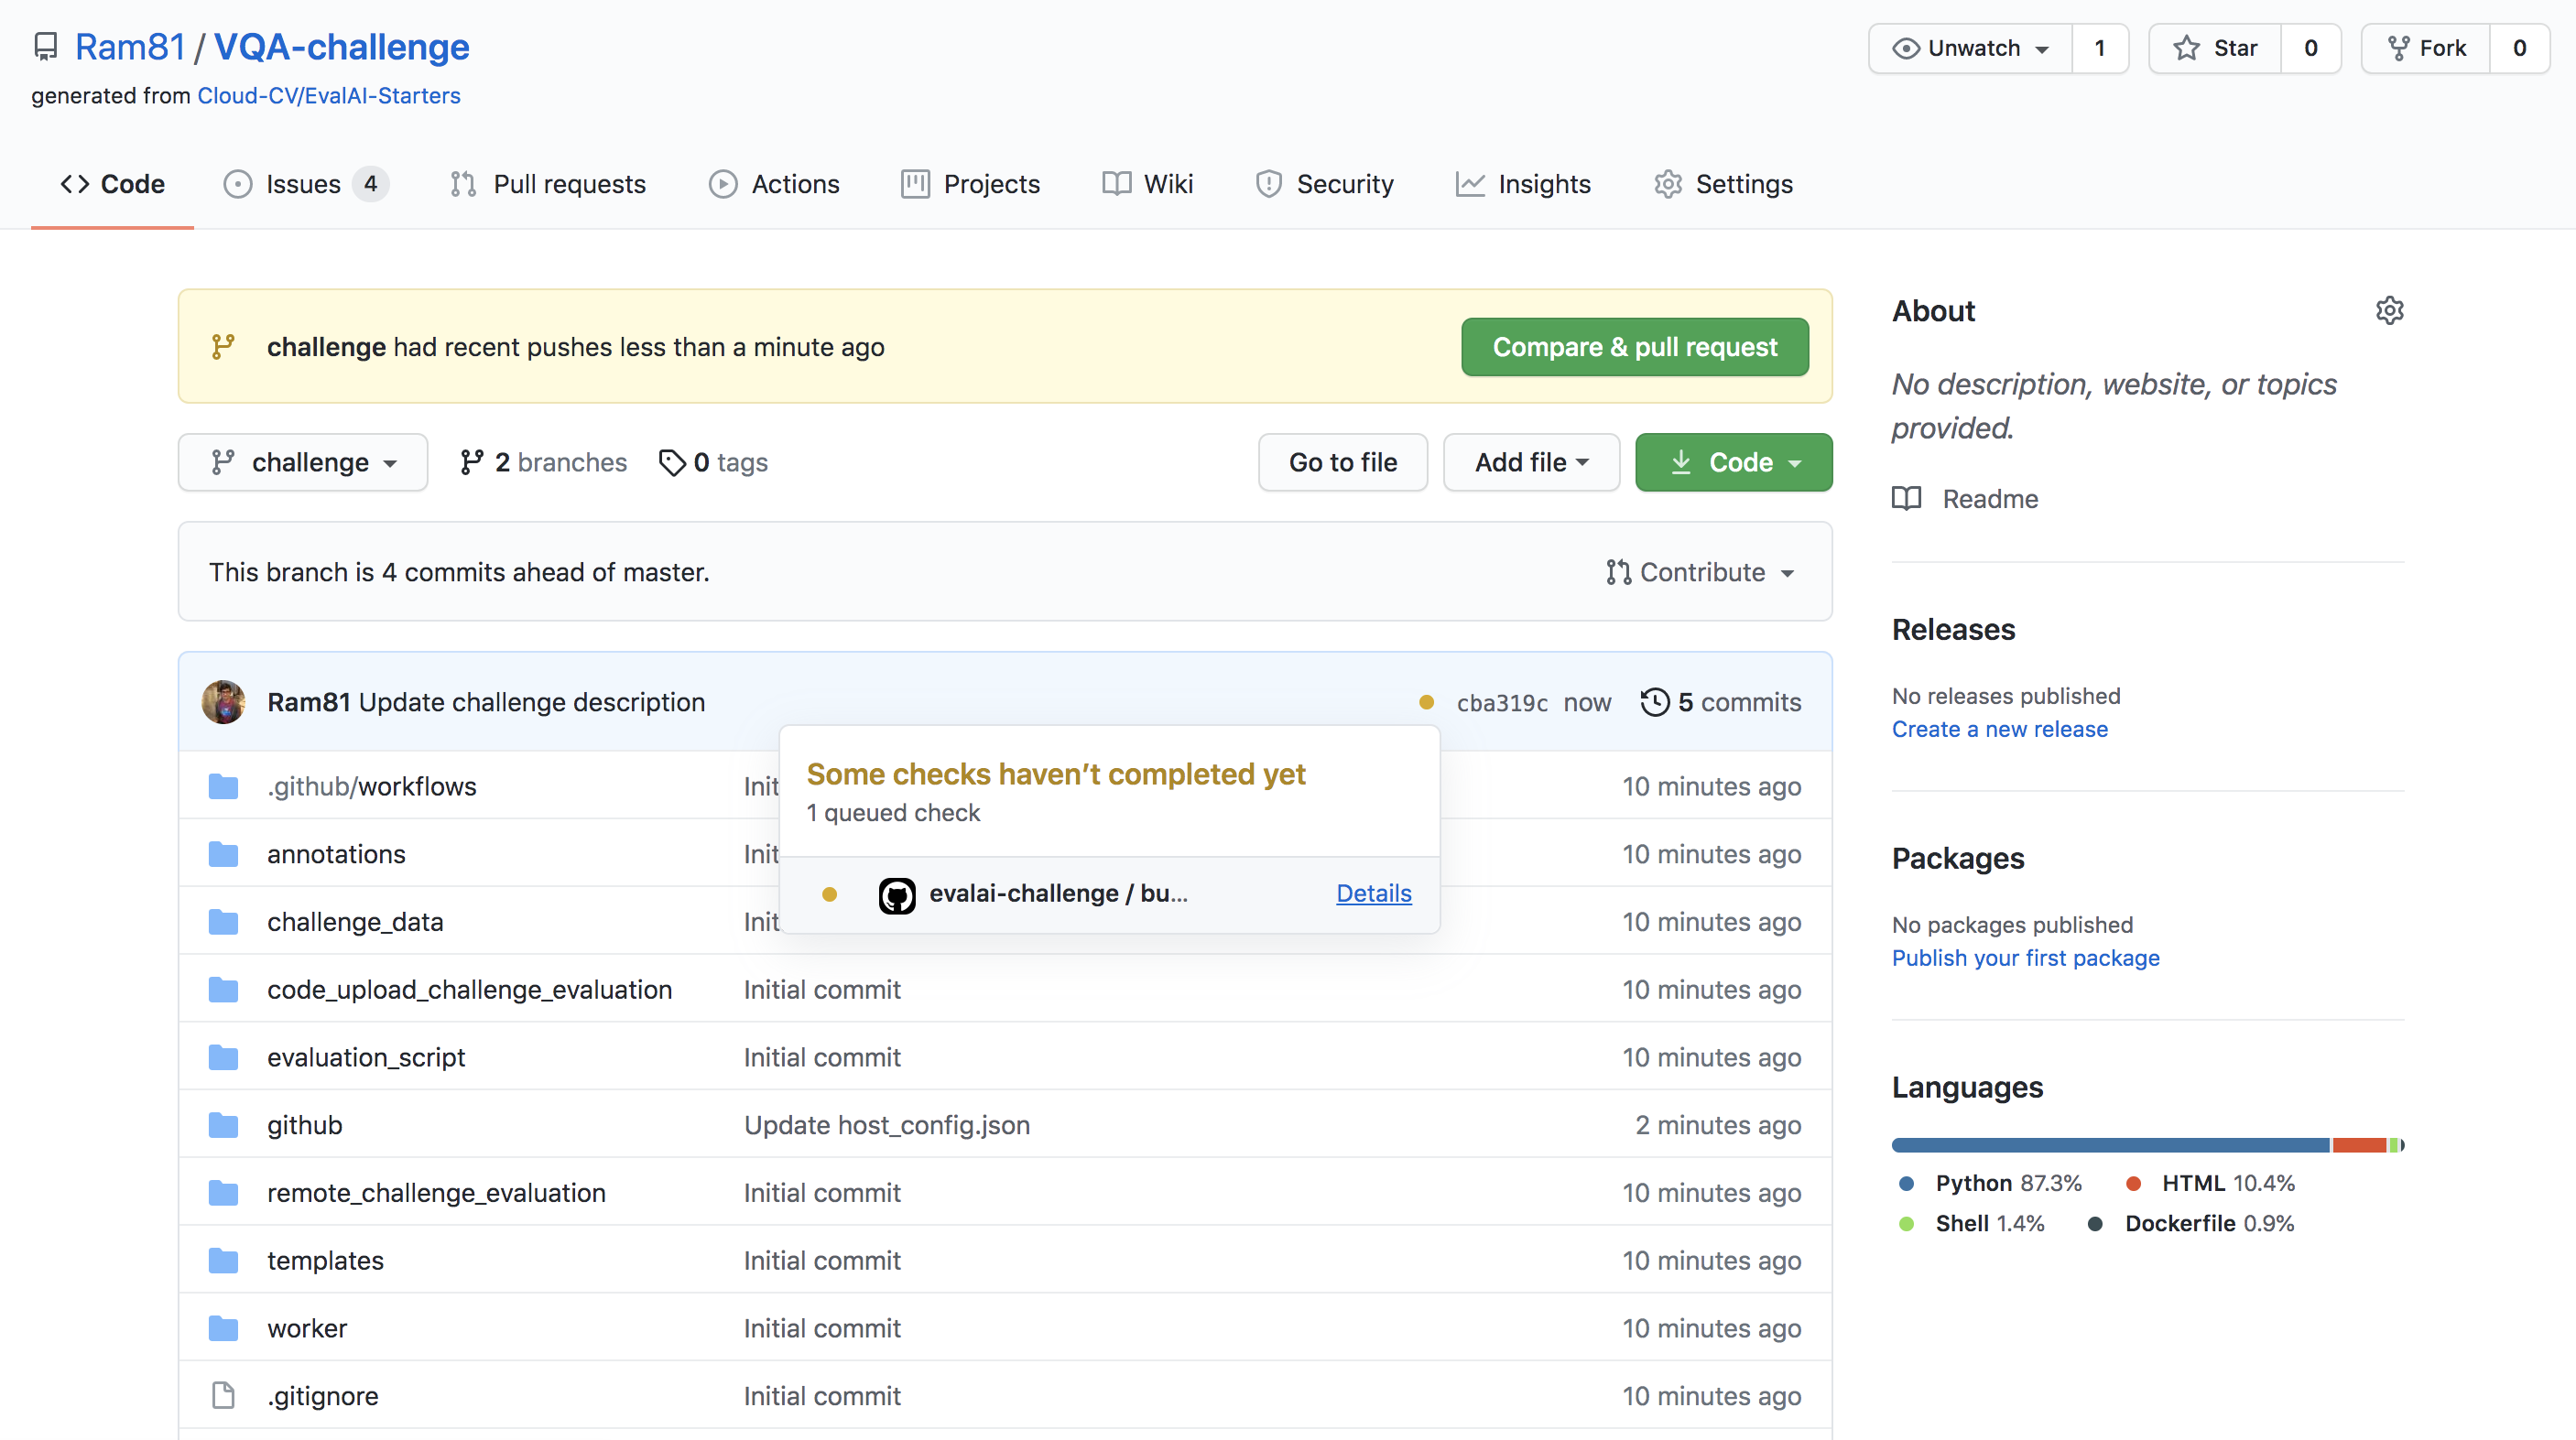
Create a branch with name challenge in the forked repository from the master branch.
Note: Only changes in challenge branch will be synchronized with challenge on EvalAI.
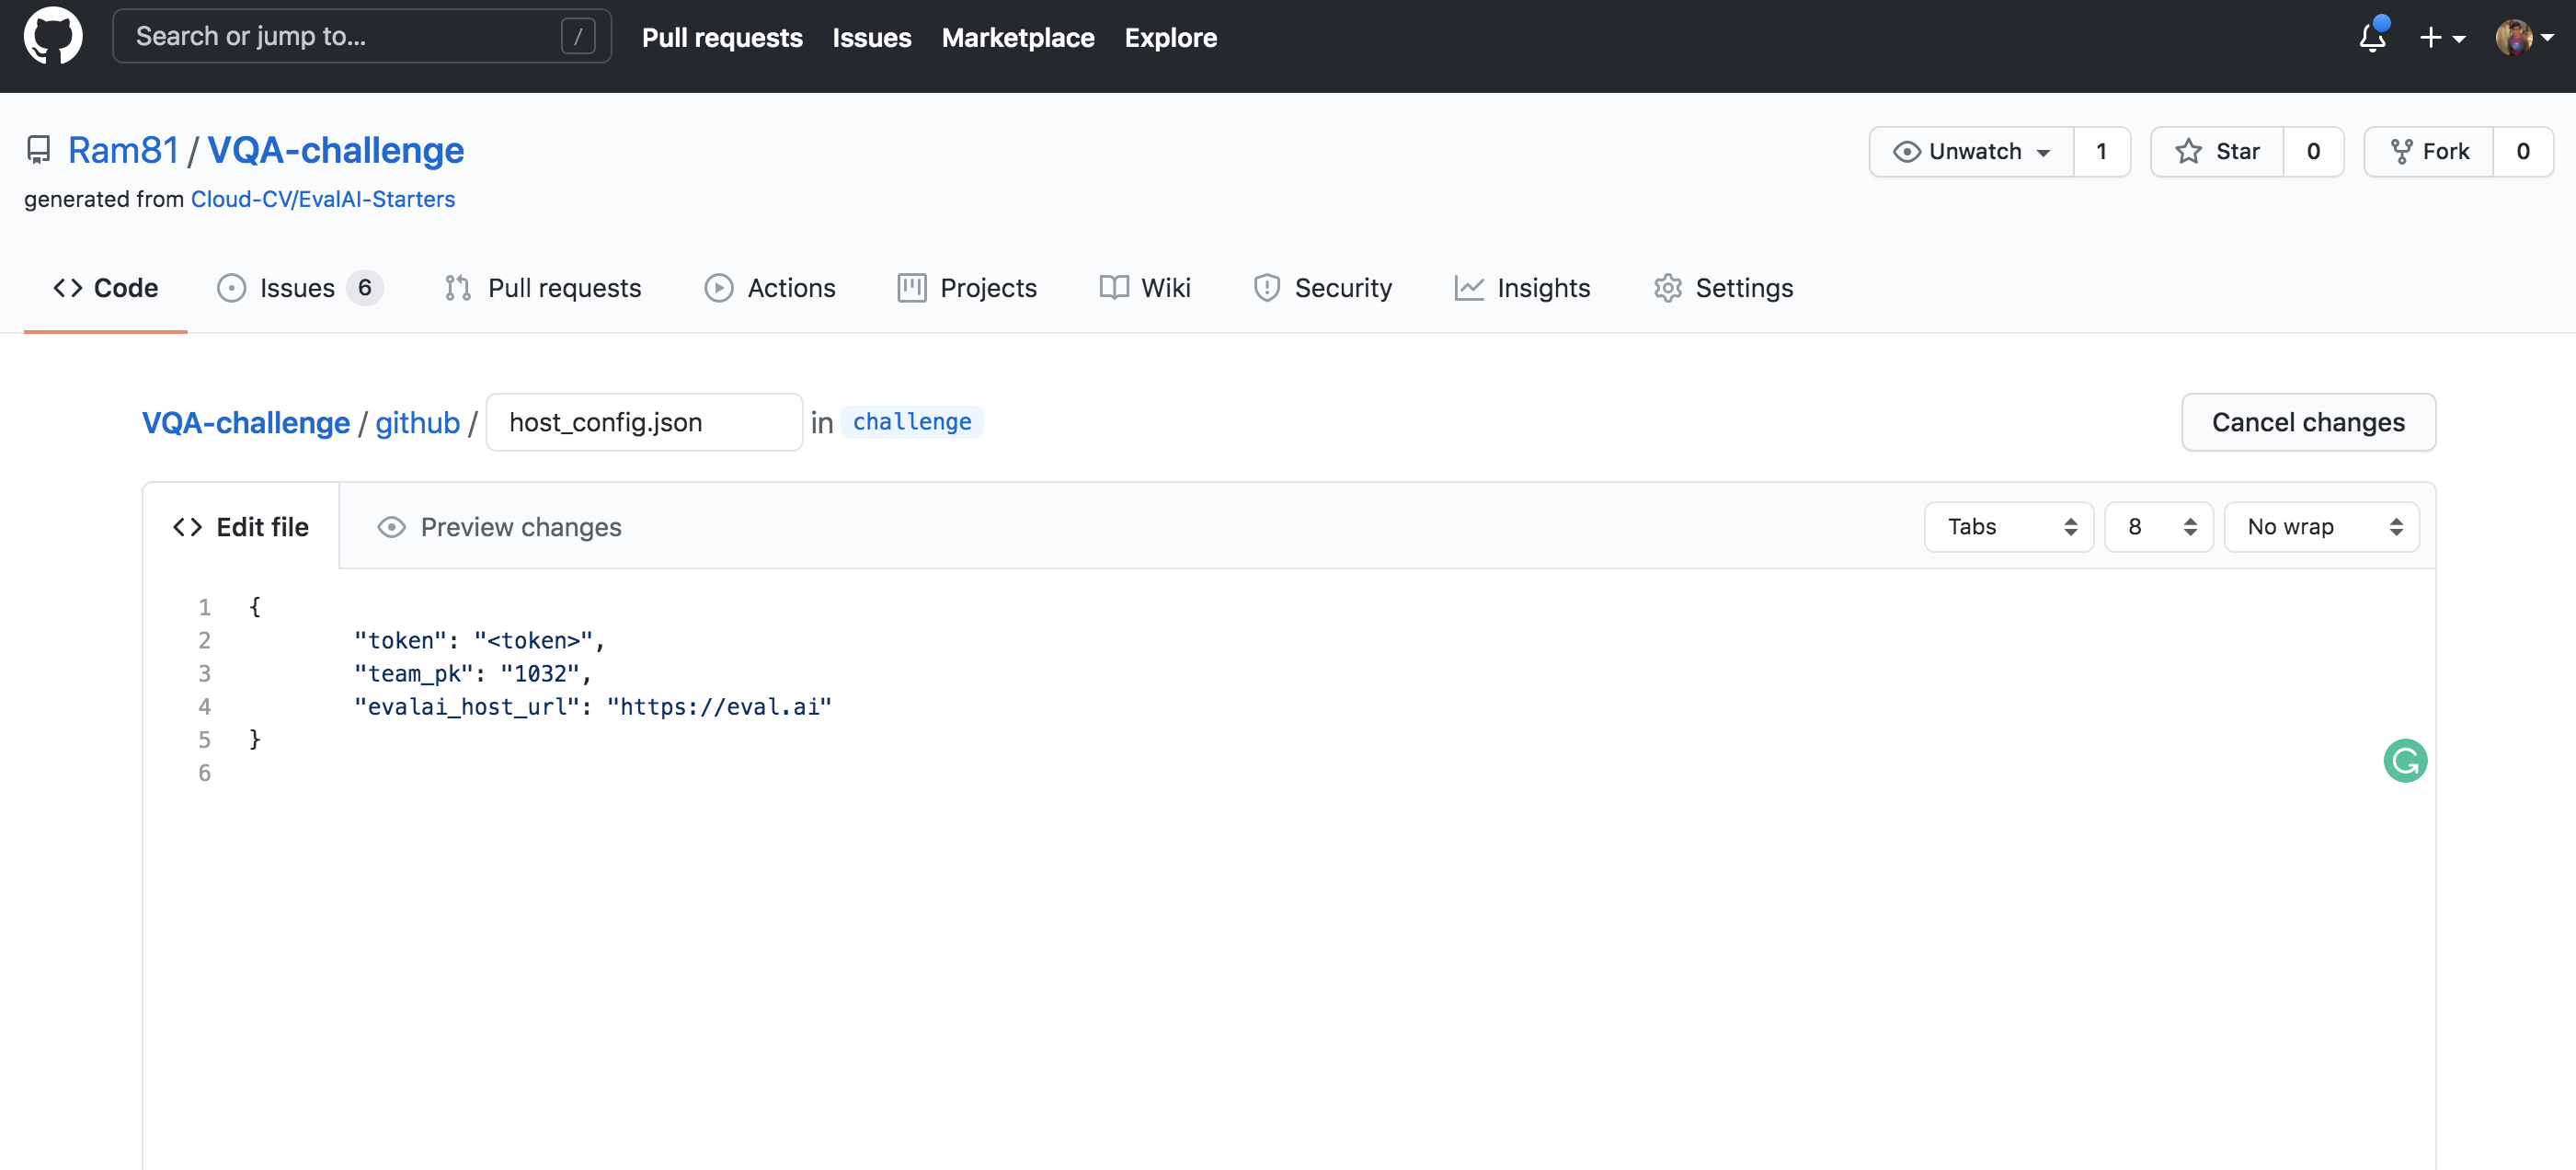
Add evalai_user_auth_token and host_team_pk in github/host_config.json.
Step 5: Update challenge details
Read EvalAI challenge creation documentation to know more about how you want to structure your challenge. Once you are ready, start making changes in the yaml file, HTML templates, evaluation script according to your need.
Step 6: Push changes to the challenge
Commit the changes and push the challenge branch in the repository and wait for the build to complete. View the logs of your build.
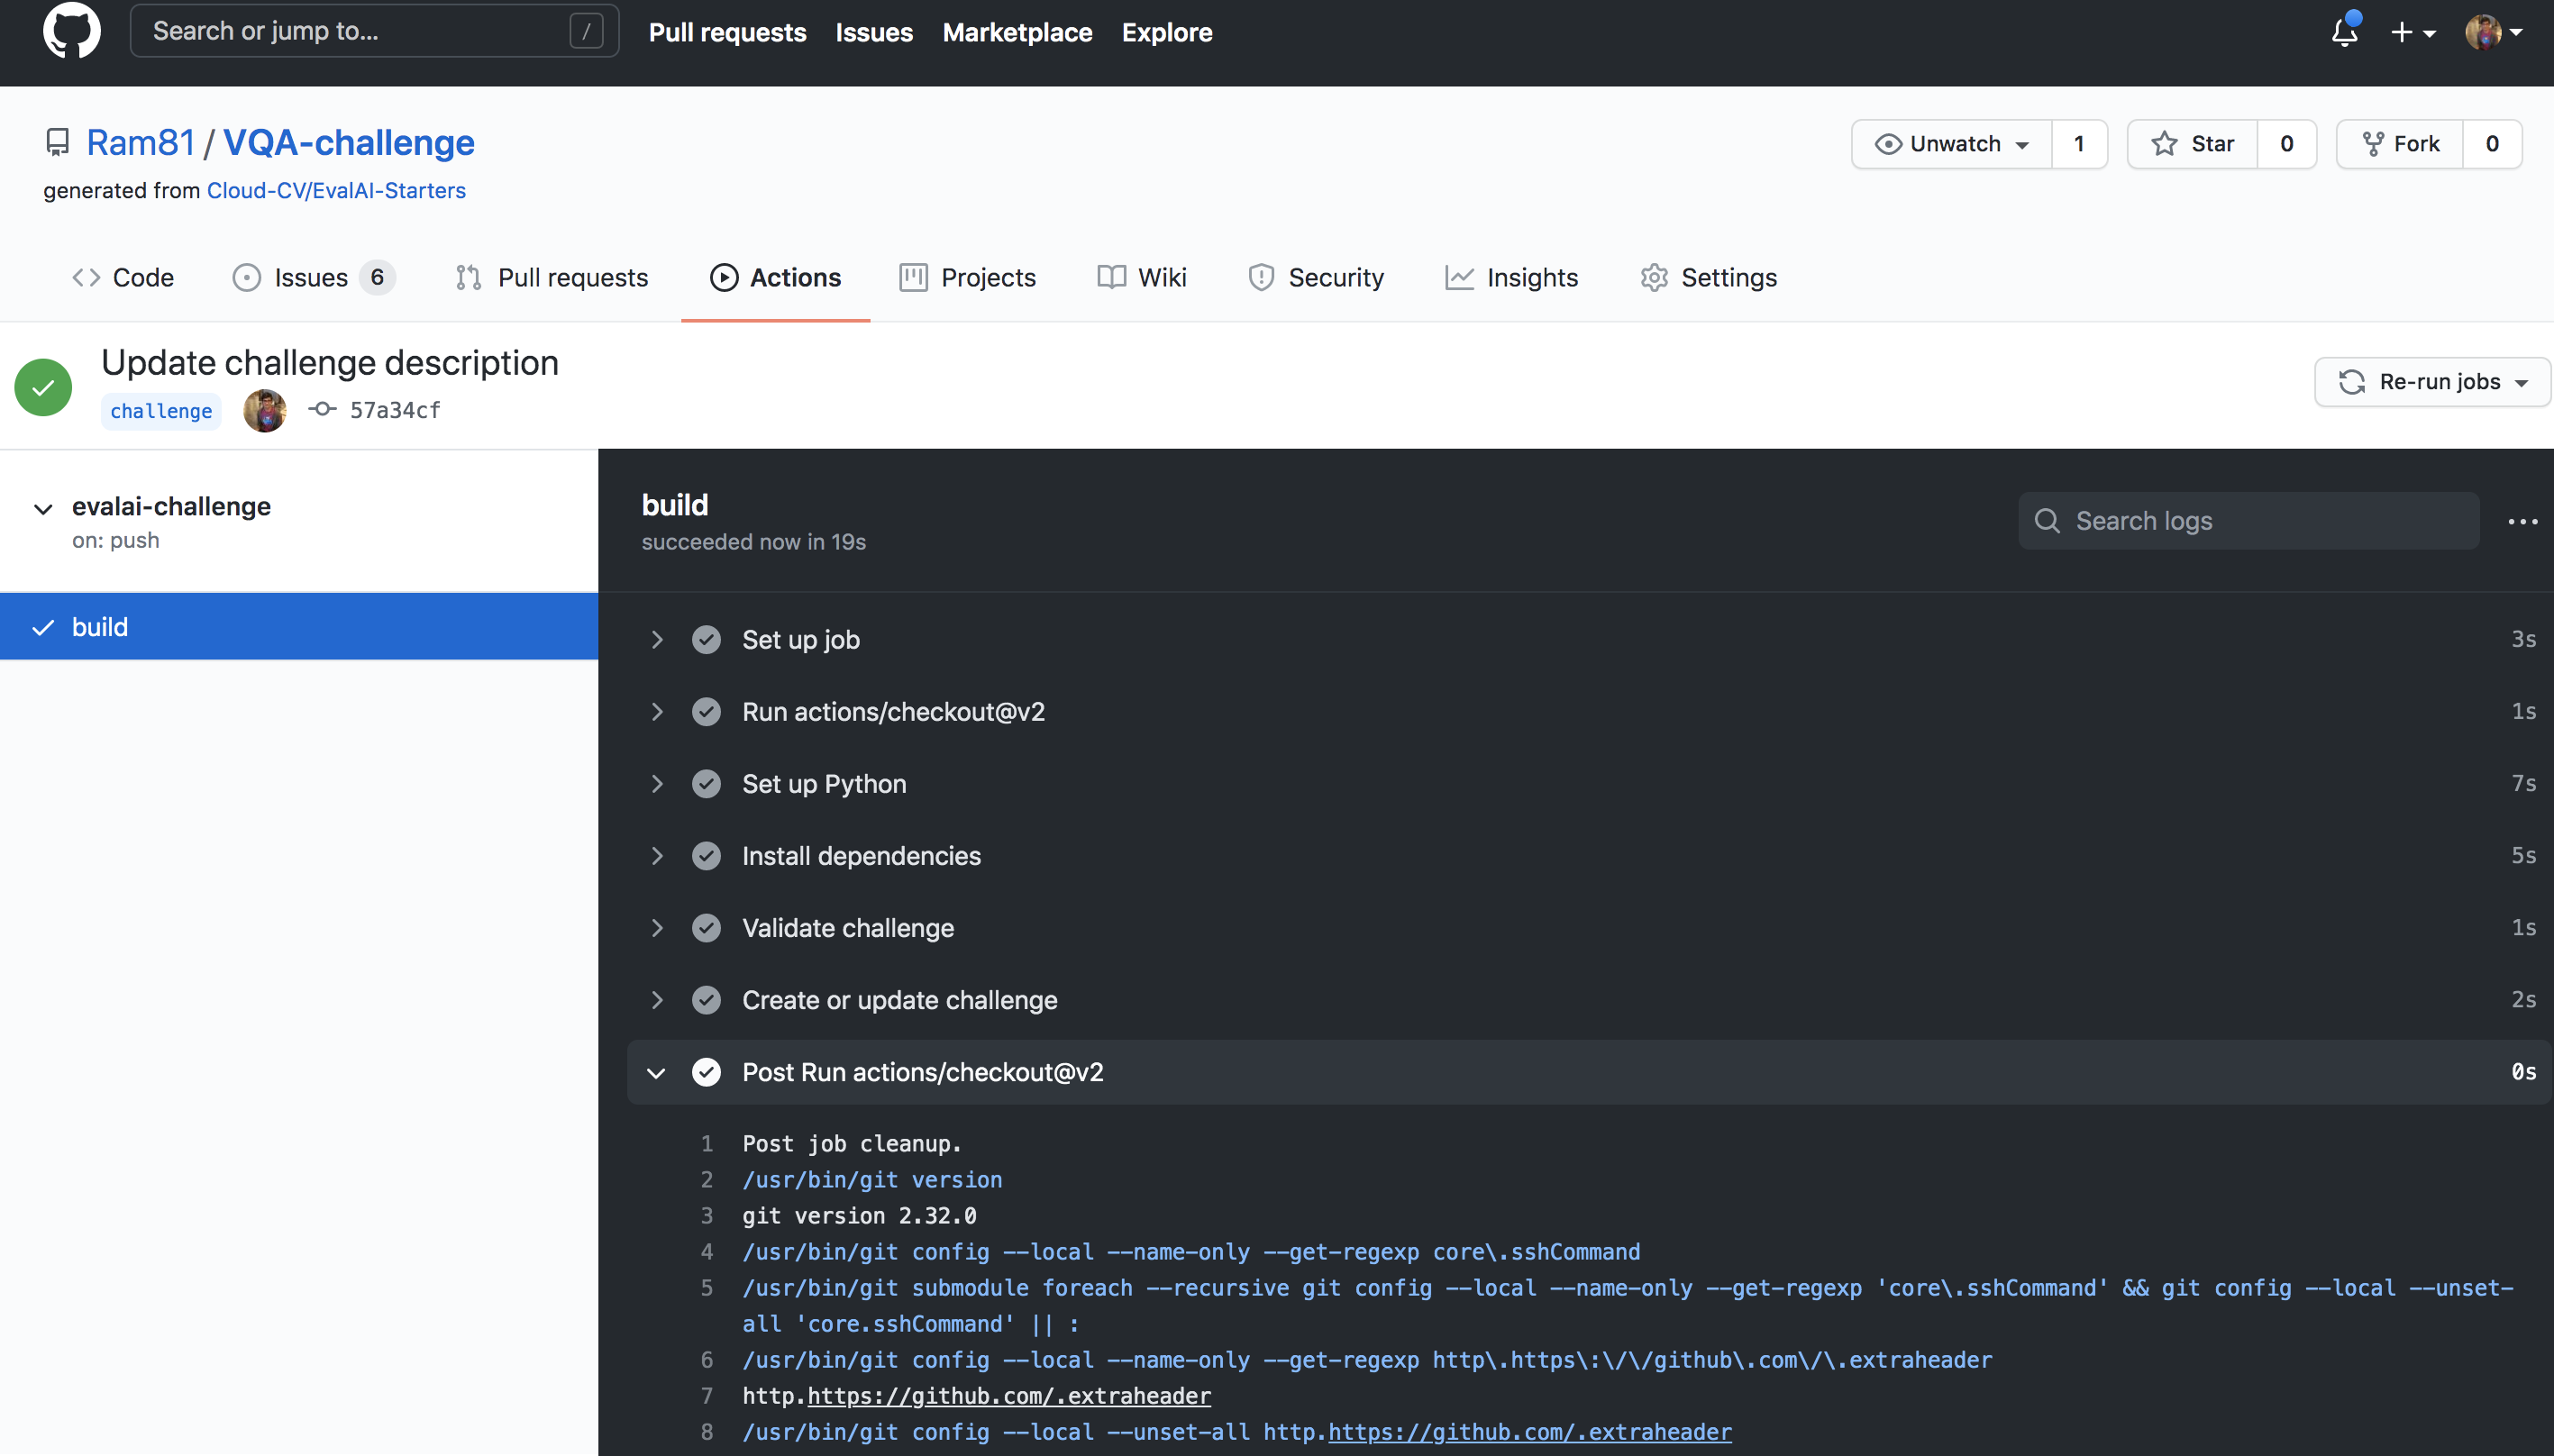
If challenge config contains errors then a issue will be opened automatically in the repository with the errors otherwise the challenge will be created on EvalAI.
Step 7: Verify challenge
Go to Hosted Challenges to view your challenge. The challenge will be publicly available once EvalAI admin approves the challenge.
To update the challenge on EvalAI, make changes in the repository and push on challenge branch and wait for the build to complete.
Host Prediction upload based challenge
Step 1: Setup challenge configuration
We have created a sample challenge configuration that we recommend you to use to get started. Use EvalAI-Starters template to start. See this on how to use a repository as template.
Step 2: Edit challenge configuration
Open challenge_config.yml from the repository that you cloned in step-1. This file defines all the different settings of your challenge such as start date, end date, number of phases, and submission limits etc.
Edit this file based on your requirement. For reference to the fields, refer to the challenge configuration reference section.
Step 3: Edit evaluation script
Next step is to edit the challenge evaluation script that decides what metrics the submissions are going to be evaluated on for different phases.
Please refer to the writing evaluation script to complete this step.
Step 4: Edit challenge HTML templates
Almost there. You just need to update the HTML templates in the templates/ directory of the bundle that you cloned.
EvalAI supports all kinds of HTML tags which means you can add images, videos, tables etc. Moreover, you can add inline CSS to add custom styling to your challenge details.
Congratulations! you have submitted your challenge configuration for review and EvalAI team has notified about this. EvalAI team will review and will approve the challenge.
If you have issues in creating a challenge on EvalAI, please feel free to contact us at team@cloudcv.org create an issue on our GitHub issues page.
Host Code upload based challenge
Step 1: Setup challenge configuration
Steps to create a Code upload based challenge is very similar to what it takes to create a prediction upload based challenge.
We have created a sample challenge configuration that we recommend you to use to get started. Use EvalAI-Starters template to start. See this on how to use a repository as template.
Step 2: Edit challenge configuration
Open challenge_config.yml from the repository that you cloned in step-1. This file defines all the different settings of your challenge such as start date, end date, number of phases, and submission limits etc. Edit this file based on your requirement.
Make sure that following fields are set correctly:
remote_evaluationis set toTrueis_docker_basedis set toTrue
For reference to the fields, refer to the challenge configuration reference section.
Step 3: Edit evaluation script
Next step is to edit the challenge evaluation script that decides what metrics the submissions are going to be evaluated on for different phases.
Please refer to the writing evaluation script to complete this step.
Step 4: Edit challenge HTML templates
Almost there. You just need to update the HTML templates in the templates/ directory of the bundle that you cloned.
EvalAI supports all kinds of HTML tags which means you can add images, videos, tables etc. Moreover, you can add inline CSS to add custom styling to your challenge details.
Congratulations! you have submitted your challenge configuration for review and EvalAI team has notified about this. EvalAI team will review and will approve the challenge.
If you have issues in creating a challenge on EvalAI, please feel free to contact us at team@cloudcv.org create an issue on our GitHub issues page.